The ignition system in a 1966 Chevelle is crucial for engine performance, requiring precise wiring diagrams for accurate repairs, modifications, and troubleshooting common issues․
Overview of the 1966 Chevelle Ignition System
The 1966 Chevelle ignition system is a critical component of the vehicle, essential for proper engine operation․ It consists of the ignition coil, distributor, spark plugs, and associated wiring․ The system generates and distributes the high voltage needed for combustion․ Proper timing and precise wiring are crucial for optimal performance․ The ignition coil acts as the heart, converting battery voltage to high-voltage sparks․ The distributor directs these sparks to the correct cylinders at the right time․ Spark plug wires carry the voltage, ensuring efficient combustion․ Accurate wiring diagrams are vital for repairs, upgrades, and troubleshooting․ Understanding this system is key for maintaining or restoring a 1966 Chevelle․
Importance of Accurate Wiring Diagrams
Accurate wiring diagrams are essential for the proper functioning and safety of the 1966 Chevelle’s ignition system․ They provide a clear visual representation of wire connections, ensuring correct installation and troubleshooting․ Without precise diagrams, identifying faults becomes challenging, leading to potential misdiagnoses and dangerous electrical issues․ Correct wiring prevents short circuits, which can cause fires or system failures․ Additionally, accurate diagrams help maintain the integrity of the vehicle’s electrical system, ensuring reliable performance and preventing costly repairs․ For both novice and experienced mechanics, having detailed wiring diagrams is crucial for successful upgrades or restorations, guaranteeing the ignition system operates safely and efficiently․
Ignition System Components
The ignition system includes the ignition coil, distributor cap, rotor, spark plug wires, and ignition switch․ These components work together to generate and distribute the spark needed for combustion․
Ignition Coil Function and Design
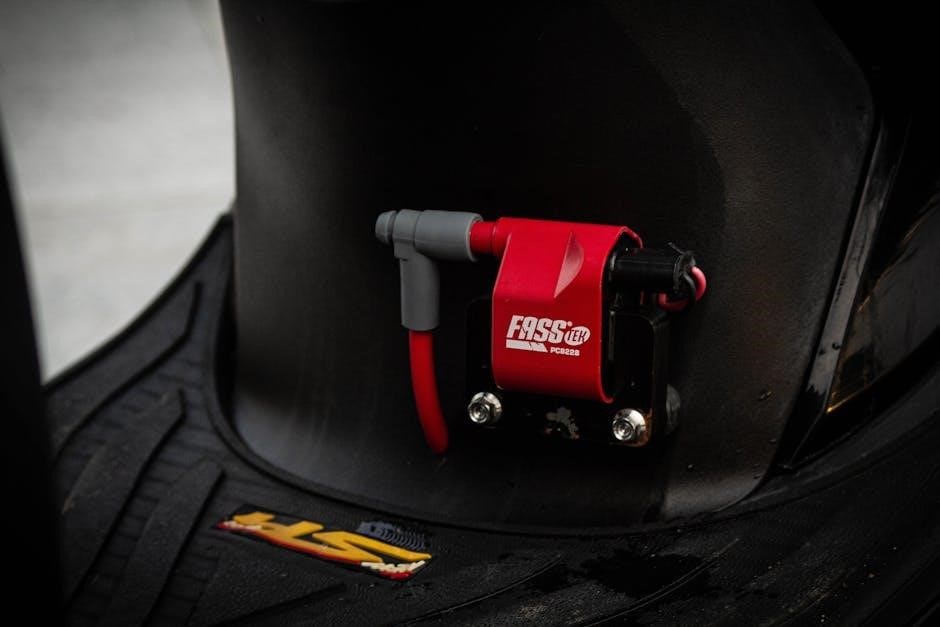
The ignition coil in the 1966 Chevelle serves as a transformer, converting the vehicle’s 12-volt battery voltage into the high voltage needed for spark plugs․ Its design features primary and secondary windings, with the secondary producing the high-voltage output․ The coil’s internal resistor helps reduce radio interference․ Proper wiring is essential to ensure the coil functions correctly, as incorrect connections can lead to no-start conditions or misfires․ The coil’s design is durable but requires careful handling to avoid damage․ Always refer to a wiring diagram for accurate connections, and ensure the coil is grounded properly for optimal performance․
Distributor Cap and Rotor
The distributor cap and rotor are essential components of the 1966 Chevelle’s ignition system, responsible for directing high voltage to the correct spark plug wires․ The rotor spins inside the cap, creating a magnetic field that routes the spark to each cylinder․ Over time, wear and tear can cause cracks or carbon buildup on the cap and erosion on the rotor, leading to misfires․ Replacing these parts requires careful alignment and installation․ A wiring diagram can help ensure proper connections between the coil, distributor, and spark plugs․ Regular inspection and maintenance of these components are crucial for reliable engine performance and fuel efficiency․
Spark Plug Wires and Boots
Spark plug wires and boots play a vital role in the ignition system of a 1966 Chevelle, carrying high voltage from the distributor to the spark plugs․ Over time, the wires can degrade, causing cracks and wear, which may lead to voltage leaks and misfires․ The boots, located at each end of the wires, protect the connections from dirt and moisture․ Proper installation and routing, as shown in wiring diagrams, are essential to prevent interference and ensure optimal performance․ Regular inspection and replacement of these components can prevent ignition issues and maintain the engine’s efficiency and power output effectively over time․
Ignition Switch and Circuit Breaker
The ignition switch and circuit breaker are essential components in the 1966 Chevelle’s ignition system, controlling the electrical flow to the ignition coil and other systems․ The ignition switch activates the circuit, while the circuit breaker protects it from overloads by interrupting the power when a fault is detected․ Proper wiring, as detailed in the wiring diagram, ensures reliable operation․ Over time, wear and tear can cause the switch to malfunction or the breaker to fail, requiring replacement․ Understanding their roles and connections is crucial for diagnosing and repairing issues, ensuring the engine starts and runs smoothly without electrical interruptions or hazards․ Regular maintenance can extend their lifespan and prevent unexpected failures․
1966 Chevelle Ignition Coil Wiring Diagram
The wiring diagram provides a detailed layout of the ignition coil circuit, including connections and color-coded wires, ensuring accurate repairs and upgrades while preventing electrical issues․
Understanding the Wiring Diagram Layout
The wiring diagram for the 1966 Chevelle ignition coil is organized to simplify repairs․ It illustrates the circuit’s flow, starting from the ignition switch to the coil, distributor, and spark plugs․ Color-coded wires are clearly marked, such as the yellow wire connecting the ignition switch to the coil, and the black wire for the ground connection․ Icons and symbols represent components like resistors and connectors, aiding in identification․ The layout ensures technicians can trace each wire’s path efficiently, identify potential issues, and perform precise repairs without confusion․ This clarity is essential for maintaining the system’s reliability and performance, as miswiring can lead to engine misfires or failure to start․ Proper understanding of the diagram helps avoid common mistakes and ensures all connections are secure and correct, preventing electrical surges or voltage drops that could damage components․ By following the diagram, enthusiasts can confidently diagnose and fix ignition-related problems, ensuring their Chevelle runs smoothly and efficiently․ Accurate interpretation of the wiring layout is crucial for both novice mechanics and experienced technicians, making it an indispensable tool for any ignition system work․ The diagram’s logical structure and detailed labeling make it easier to pinpoint faults quickly, reducing downtime and ensuring a successful repair process․ Additionally, cross-referencing the diagram with factory specifications helps maintain authenticity and performance in restored vehicles․ Overall, the wiring diagram is a comprehensive guide that streamlines the repair process, making it accessible for everyone involved in working on their 1966 Chevelle․ This resource is invaluable for troubleshooting and upgrading the ignition system, ensuring the vehicle continues to perform at its best․ By adhering to the diagram’s instructions, users can avoid costly errors and maintain the integrity of their vehicle’s electrical system․ The detailed layout also serves as a reference for future maintenance, providing a clear roadmap for any ignition-related tasks․ In summary, understanding the wiring diagram layout is fundamental for effectively working on the 1966 Chevelle ignition coil, ensuring reliability and optimal performance․
Color Coding and Wire Identification
The 1966 Chevelle ignition coil wiring diagram uses color coding to simplify wire identification․ The yellow wire typically connects the ignition switch to the coil, while the black wire serves as the ground․ Red wires often link to the distributor, and green wires connect to spark plugs․ These colors help trace the circuit path and identify components quickly․ Proper wire identification prevents miswiring, which can cause electrical failures or fire hazards․ The color coding system ensures consistency and accuracy during repairs or upgrades․ By matching the diagram’s colors, technicians can efficiently diagnose issues and ensure all connections are secure․ This method reduces confusion and enhances the safety of electrical repairs․ Accurate wire identification is crucial for maintaining the ignition system’s reliability and performance․ The color-coded system is a key feature of the wiring diagram, making it an essential tool for both novices and experienced mechanics․ Understanding the color codes ensures that repairs are done correctly, avoiding potential damage to the vehicle’s electrical system․ This attention to detail is vital for preserving the integrity of the ignition system and ensuring the vehicle runs smoothly․ By adhering to the color-coded guidelines, enthusiasts can confidently work on their 1966 Chevelle, knowing they are following a proven and reliable method․ The color coding system is a testament to the thoughtful design of the wiring diagram, providing clarity and precision for all users․ This approach minimizes errors and maximizes efficiency, making it an indispensable resource for anyone working on the ignition system․ The use of color coding and wire identification ensures that even complex repairs become manageable tasks, fostering a sense of confidence and competence among those who use the diagram․ Overall, the color-coded wiring system is a fundamental aspect of the 1966 Chevelle ignition coil wiring diagram, offering a clear and structured approach to electrical repairs and upgrades․
Common Mistakes to Avoid
When working with the 1966 Chevelle ignition coil wiring diagram, common mistakes include misconnecting wires based on color coding or incorrect diagram interpretations․ Overlooking ground connections can lead to system malfunctions․ Using incorrect wire gauges or ignoring resistor specifications may cause voltage drops or component damage․ Another mistake is not verifying wire conditions before installation, which can result in short circuits․ Additionally, failing to consult the diagram during repairs often leads to miswiring, affecting spark distribution․ Mixing up distributor wires with spark plug wires is another frequent error․ Avoiding these mistakes ensures reliable ignition system performance and prevents costly repairs․ Proper adherence to the wiring diagram is essential for maintaining the vehicle’s electrical integrity and functionality․ By being mindful of these common pitfalls, enthusiasts can ensure a smooth and successful repair process, keeping their Chevelle running at its best․ The key is to follow the diagram meticulously and double-check all connections before starting the engine․ This careful approach minimizes risks and maximizes the effectiveness of the ignition system․ Always refer to the wiring diagram to avoid confusion and ensure accuracy in every step of the process․ This attention to detail will help prevent avoidable issues and prolong the lifespan of the ignition components․ By learning from these common mistakes, individuals can enhance their DIY repair skills and maintain their classic Chevelle with confidence and precision․ The wiring diagram serves as a guide to prevent errors, making it an invaluable resource for both novices and experienced mechanics․ Staying vigilant and methodical during repairs ensures that the ignition system operates efficiently and reliably․ Ignoring these precautions can lead to frustrating setbacks, so it’s crucial to approach each step with care and attention․ The end result is a well-functioning ignition system that powers the Chevelle effortlessly, providing a seamless driving experience․ Avoiding these mistakes not only saves time but also ensures the longevity of the vehicle’s electrical components․ By prioritizing accuracy and adhering to the wiring diagram, enthusiasts can achieve professional-grade results in their DIY projects․ This meticulous approach fosters a deeper understanding of the ignition system and enhances overall satisfaction with the repair process․ In conclusion, being aware of these common mistakes and taking steps to avoid them is essential for successful ignition system repairs on the 1966 Chevelle․
Troubleshooting Common Issues
Troubleshooting the 1966 Chevelle ignition system involves diagnosing no spark conditions, checking for faulty components like the coil or distributor, and ensuring proper wiring connections․ Misfires often stem from worn spark plug wires or poor ground connections․ Always refer to the wiring diagram to trace and repair issues effectively, avoiding voltage surges that could damage components․
Diagnosing No Spark Conditions
Diagnosing no spark conditions in a 1966 Chevelle involves checking the ignition coil, distributor cap, and spark plug wires for damage or wear․ Ensure the ignition switch and resistor wire are functioning correctly․ Voltage surges from the coil pack can indicate faulty components․ Verify ground connections and consult the wiring diagram to trace circuits․ Use a multimeter to test resistance and continuity in the ignition system․ If no spark is detected, inspect the distributor rotor and cap for cracks or carbon buildup․ Replace any faulty components and ensure proper wiring connections to restore spark and engine performance․ Always follow safety guidelines during diagnostics․
Identifying Faulty Components
Identifying faulty components in the 1966 Chevelle’s ignition system starts with consulting the wiring diagram to trace circuits and test individual parts․ Inspect the ignition coil for signs of wear or damage, and check the distributor cap and rotor for cracks or carbon buildup․ Spark plug wires should be examined for frays or corrosion․ Use a multimeter to test resistance and voltage drops in the circuit․ Ensure the ignition switch and resistor wire are functioning properly․ If voltage surges are detected, the coil or associated wiring may need relocation․ Always verify ground connections and consult the wiring diagram for accurate diagnoses․ Proper tools are essential for identifying and replacing faulty components effectively․
Safety Tips and Precautions
When working on the 1966 Chevelle ignition system, ensure the vehicle is on level ground with the engine off and the ignition switch in the “off” position․
Electrical Safety During Repairs
When tackling repairs on the 1966 Chevelle ignition system, electrical safety is paramount․ Always disconnect the battery to prevent accidental engine start or electrical shocks․ Ensure the ignition switch is in the “off” position and the vehicle is on level ground․ Avoid wearing jewelry that could conduct electricity, and use insulated tools to prevent short circuits․ Never work near open flames or sparks, as volatile fumes from cleaning products or fuel can ignite․ Grounding issues can lead to system malfunctions, so ensure all components are properly grounded before reconnecting the battery․ These precautions protect both the technician and the vehicle’s electrical system․
Proper Tools for the Job
When working on the 1966 Chevelle ignition system, having the right tools is essential for accurate and safe repairs․ A multimeter is crucial for diagnosing electrical issues, while insulated pliers and screwdrivers prevent accidental short circuits․ A wiring diagram tracer helps identify complex circuits, and a spark tester ensures proper ignition function․ Wire cutters and strippers are necessary for modifying or replacing wiring․ Heat-resistant electrical tape and connectors are vital for securing connections․ Additionally, a Torx set or wrench may be needed for specific components․ Always use tools designed for automotive electrical work to avoid damage to the system or personal injury․
Tools and Materials Needed
Essential tools include a multimeter, insulated pliers, screwdrivers, and a wiring diagram tracer․ Materials like heat-resistant tape, connectors, and spark plug wire boots are also necessary․ Ensure all tools are suitable for automotive electrical work to maintain safety and precision during repairs or upgrades․
Essential Tools for Wiring Repairs
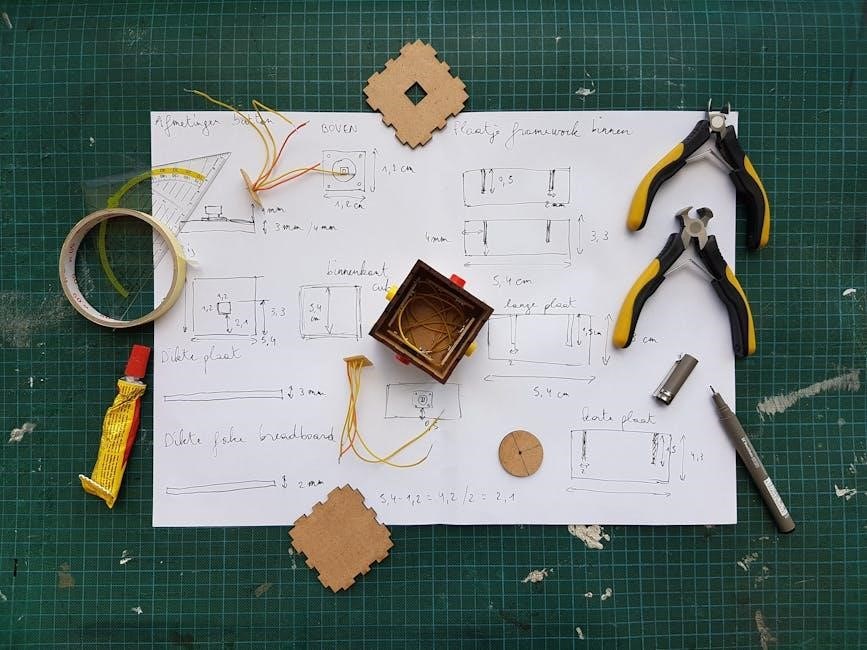
For effective wiring repairs on a 1966 Chevelle ignition system, gather essential tools like a multimeter, insulated pliers, screwdrivers, and a wiring diagram tracer․ Use heat-resistant tape for connections and high-quality connectors to prevent voltage drops․ Spark plug wire boots and a circuit tester are also crucial for diagnosing issues․ A set of torque wrenches and soldering equipment ensures secure and durable connections․ Keep a wire stripping tool handy for modifying or replacing wires․ Proper lighting and a work lamp are necessary for visibility․ Finally, consult a factory wiring diagram to guide your repairs accurately․ These tools ensure precision and safety during the process․

DIY Installation Guide
Follow a step-by-step guide to install the ignition coil, ensuring correct wire connections and proper grounding for reliable engine performance in your 1966 Chevelle․
Preparing the Vehicle
Before starting the installation, disconnect the battery to ensure electrical safety․ Relocate the ignition coil and wiring away from the ECU and its wiring to prevent interference․ Check all ground connections to ensure they are clean and secure․ Inspect the spark plug wires and boots for any signs of wear or damage․ Consult the wiring diagram to identify the correct terminals for the ignition coil․ Avoid routing wires near high-heat sources or moving parts․ Use proper tools to secure the ignition coil in its mounting bracket․ Ensure the area around the coil is free from debris and moisture for optimal performance․
Accessing the Ignition Coil
Locate the ignition coil, typically near the distributor on a 1966 Chevelle․ Disconnect the battery to prevent accidental engine start․ Remove any brackets or components blocking access․ Gently pull the coil wiring harness to avoid damaging the connections․ Ensure the area around the coil is clear of debris․ Check the ground wires for cleanliness and proper connection․ If the coil is mounted securely, remove the mounting bracket bolts to access it․ Avoid touching electrical components with bare hands to prevent static discharge․ Refer to the wiring diagram to confirm the coil’s location and connections before proceeding with any modifications or repairs․
Connecting the Wires Correctly
Start by disconnecting the battery to prevent electrical shocks․ Locate the ignition coil near the distributor․ Gently pull the wiring harness to access the coil․ Ensure all connections are clean and secure․ Refer to the wiring diagram to identify each wire’s purpose and destination․ Connect the positive battery wire to the coil’s positive terminal and the ground wire to the negative terminal․ Ensure any resistor wires are correctly connected to regulate voltage․ Check the spark plug wires and boots for wear, replacing them if necessary․ Verify the distributor cap and rotor are in good condition․ Use proper tools and materials to secure connections, applying electrical tape or heat shrink tubing․ Ensure all ground wires are clean and free from corrosion for optimal conductivity․ Consult the factory service manual or online forums for additional guidance and to avoid common mistakes․ By following these steps meticulously, you can ensure the ignition system functions correctly and efficiently․
Resources and References
Factory service manuals and online forums provide detailed wiring diagrams and troubleshooting tips for the 1966 Chevelle ignition system, ensuring accurate repairs and upgrades․
Factory Service Manuals
Factory service manuals are the primary resource for accurate wiring diagrams and repair guidelines for the 1966 Chevelle ignition system․ These manuals, created by the manufacturer, provide detailed schematics, original specifications, and step-by-step instructions․ They are essential for ensuring repairs are done correctly, maintaining the car’s authenticity, and avoiding costly mistakes․ The manuals include wiring layouts, color coding, and component locations specific to the 1966 model year․ They also cover diagnostic procedures and troubleshooting tips for common issues like no spark conditions․ For enthusiasts and professionals alike, factory service manuals are indispensable for achieving a successful ignition system upgrade or restoration․
Online Forums and Communities
Online forums and communities are invaluable resources for finding detailed wiring diagrams and troubleshooting tips for the 1966 Chevelle ignition system․ Enthusiasts and experts share firsthand experiences, offering practical advice and real-world solutions․ These platforms often include discussions on common issues, such as no spark conditions, and provide guidance on identifying faulty components․ Users can ask specific questions, share their projects, and receive tailored recommendations․ Many contributors post high-quality images, diagrams, and step-by-step guides, making it easier to understand complex wiring layouts․ These communities foster collaboration, helping to preserve and share knowledge for classic car restoration and maintenance․
Accurate wiring diagrams are essential for restoring and maintaining the 1966 Chevelle’s ignition system․ Utilize factory manuals and online resources for precise repairs and upgrades․
Final Thoughts and Recommendations
Understanding and correctly wiring the ignition system of a 1966 Chevelle is vital for optimal performance and reliability․ Always refer to factory wiring diagrams or trusted resources to ensure accuracy․ For repairs, use high-quality components and proper tools to avoid potential issues․ Regular inspections of spark plug wires, the distributor, and ignition coil can prevent common problems like no spark conditions․ Consulting online forums and service manuals provides valuable insights and troubleshooting tips․ By following these guidelines, enthusiasts can maintain their classic Chevelle’s ignition system effectively, ensuring longevity and proper functionality․