Welcome to the Kenmore Self-Cleaning Oven Manual! This guide provides essential information to help you safely operate, maintain, and troubleshoot your oven. Designed to enhance your cooking experience, it covers everything from basic functionality to advanced features, ensuring optimal performance and longevity of your appliance. Follow the instructions carefully for a seamless user experience.
1.1 Overview of the Kenmore Self-Cleaning Oven
The Kenmore Self-Cleaning Oven is designed for convenience and efficiency, featuring a high-temperature cleaning cycle that simplifies maintenance. Its advanced design ensures safe operation, with automatic door locking during cleaning. The oven is built to handle heavy-duty cooking while maintaining energy efficiency. With intuitive controls and versatile features like convection cooking, it offers a seamless cooking experience. Regular use of the self-cleaning function keeps the oven in pristine condition, reducing the need for manual scrubbing and ensuring long-term performance.
1.2 Importance of Reading the Manual
Reading the Kenmore Self-Cleaning Oven Manual is crucial for understanding its features, safety guidelines, and proper usage. It provides detailed instructions for operating the self-cleaning function, troubleshooting common issues, and maintaining the appliance. The manual ensures you utilize the oven safely and efficiently, preventing potential damage or hazards. By following the guidelines, you can extend the oven’s lifespan and optimize its performance. Familiarizing yourself with the manual helps you make the most of its advanced features and troubleshoot problems confidently.
1.3 Safety Rules and Precautions
Adhering to the safety rules and precautions outlined in the Kenmore Self-Cleaning Oven Manual is essential to prevent accidents and ensure safe operation. Always keep the oven area clear of flammable materials and never leave cooking unattended. Avoid using harsh chemicals or abrasive cleaners, as they can damage the oven’s interior. Keep children away from the oven during operation, especially when using the self-cleaning feature, as high temperatures can cause burns. Never force the oven door open during the cleaning cycle, and always allow it to cool before touching any surfaces.
Safety Instructions for Kenmore Self-Cleaning Oven
Always follow safety guidelines to prevent accidents. Keep flammable materials away, avoid harsh chemicals, and never force the oven door open during cleaning. Ensure children stay away.
2.1 General Safety Warnings
Always prioritize safety when using your Kenmore self-cleaning oven. Keep flammable materials away from the oven, as high temperatures can ignite them. Never force the oven door open during the cleaning cycle, as this can cause injury. Avoid using harsh chemicals, as they may damage the interior or release harmful fumes. Ensure children stay away from the oven while it is in use or cleaning. Proper ventilation is essential to prevent fume buildup. Follow all instructions carefully to avoid accidents and maintain your oven’s performance.
2.2 Precautions Before Using the Self-Cleaning Feature
Before using the self-cleaning feature, ensure the oven is properly prepared. Remove all racks, utensils, and food residue to prevent damage or fires. Clean the oven door gasket, as it should not be tampered with during cleaning. Set the correct time on the oven clock and ensure the oven is empty. Avoid leaving any plastic or metal items inside, as they may melt or burn. Keep the area well-ventilated to prevent fume buildup. Always refer to the manual for specific instructions to ensure safe and effective cleaning.
2.3 Safety Measures During the Self-Cleaning Cycle
During the self-cleaning cycle, the oven reaches extremely high temperatures, producing intense heat and fumes. Keep children and pets away from the oven. Never open the oven door during the cycle, as it will be locked to ensure safety. Ensure proper ventilation in the room to avoid inhaling fumes. Avoid touching the oven surface, as it will be extremely hot. Do not interrupt the cycle unless absolutely necessary, and only then with caution. Always adhere to the manufacturer’s guidelines to prevent accidents and ensure a safe cleaning process.
2.4 Post-Cleaning Safety Tips
After the self-cleaning cycle, allow the oven to cool completely before opening the door or touching any surfaces. Avoid using abrasive cleaners or harsh chemicals, as they can damage the interior finish. Inspect the oven for any remaining food residue and wipe it clean with a damp cloth. Ensure the oven door seal is intact to maintain proper function. Keep the area well-ventilated to remove any lingering fumes. Always follow the manufacturer’s recommendations for post-cleaning care to maintain your oven’s performance and safety.
Operating the Kenmore Self-Cleaning Oven
This section guides you through operating your Kenmore self-cleaning oven, including starting the cycle, setting the timer, and using the delay start feature for convenience. Proper usage ensures efficient cleaning and maintenance.
3.1 Starting the Self-Cleaning Cycle
To start the self-cleaning cycle on your Kenmore oven, ensure the oven is empty and all racks are removed. Close the oven door and press the CLEAN button. The default cleaning time is 3 hours, but you can adjust it by selecting 2 or 4 hours based on soil level. Once set, the oven will lock automatically. The cycle uses high heat to burn food residue, leaving ashes to wipe away. Allow the oven to cool before opening the door. Follow these steps for a safe and effective cleaning process.
3.2 Setting the Self-Cleaning Timer
To set the self-cleaning timer, press the CLEAN button on the control panel. The default cleaning time is 3 hours, but you can adjust it by pressing the numeric keypad to select 2 or 4 hours, depending on the soil level. Once selected, press the START button to begin the cycle. The oven door will lock automatically for safety. Ensure the oven is empty, racks are removed, and the door is closed before starting. The timer will count down, and the cycle will stop once complete. Let the oven cool before opening the door.
3.3 Using the Delay Start Feature
The delay start feature allows you to schedule the self-cleaning cycle to begin at a later time. After pressing the CLEAN button and selecting the desired cleaning time, enter the start time using the numeric keypad. Press the DELAY button, and the oven will lock the door and begin cleaning at the set time. This feature is convenient for unattended cleaning, ensuring the oven is spotless when you need it. Always ensure the oven is empty and all racks are removed before setting the delay start to avoid any issues during the cycle.
3.4 Understanding the Cleaning Process
The Kenmore self-cleaning oven uses high heat to burn food residue into ash. During the cycle, the oven reaches extreme temperatures, locking the door for safety. The process typically lasts 2-4 hours, depending on soil level. After cooling, wipe away ash with a damp cloth. Avoid harsh chemicals, as the oven’s finish may be damaged. Ensure the oven is empty and racks are removed before starting. This method is efficient and minimizes manual scrubbing, keeping your oven clean and maintained with minimal effort. Always follow safety guidelines to avoid accidents.
Preparing the Oven for Self-Cleaning
Remove racks and utensils, clean the door gasket, ensure the oven is empty, and set the correct time before starting the self-cleaning cycle for optimal results.
4.1 Removing Oven Racks and Utensils
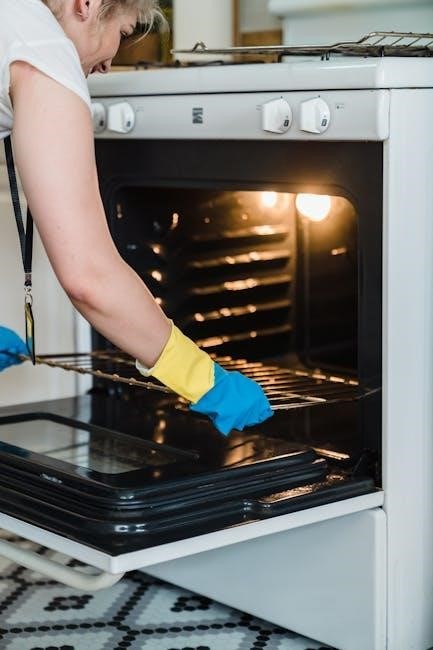
Before initiating the self-cleaning cycle, ensure all oven racks and utensils are removed to prevent damage and ensure proper cleaning. This step is crucial for safety and effectiveness. Remove broiler pans, trays, and any cookware stored inside the oven. Use oven mitts to protect your hands during this process. Additionally, check for any food debris or spills that may require immediate attention. Leaving racks or utensils inside can cause warping or discoloration. Clean or store these items separately to maintain your oven’s performance and longevity.
4.2 Cleaning the Oven Door Gasket
Always avoid cleaning the oven door gasket, as it may damage the seal. The gasket is designed to withstand high temperatures and should not be removed or altered. During the self-cleaning cycle, the gasket remains intact, ensuring proper insulation. For general maintenance, wipe the gasket gently with a damp cloth to remove any visible debris. Never use harsh chemicals, abrasive cleaners, or scrubbers, as they can compromise the gasket’s integrity. Proper care ensures the gasket remains effective, maintaining your oven’s energy efficiency and safety.
4.3 Ensuring the Oven is Empty
Before starting the self-cleaning cycle, ensure the oven is completely empty. Remove all racks, utensils, and cookware to prevent damage during high-temperature cleaning. Do not leave the broiler pan or any food particles inside, as they may burn or melt, causing damage. Check for any stored items, such as foil or oven mitts, and remove them. A clean oven ensures the self-cleaning process works effectively and safely. Always verify the oven is empty to avoid any potential hazards or malfunctions during the cycle.
4.4 Setting the Correct Time
Setting the correct time is essential for proper operation of the self-cleaning feature. Before initiating the cycle, ensure the oven clock is set to the current time. Press the clock button and adjust the time using the numerical keypad or arrow keys, depending on your model. The default self-cleaning time is typically 3 hours, but you can adjust it to 2 or 4 hours based on soil level. Once set, the oven will start the cycle at the designated time. Ensure the time is accurate to avoid delays or mismatches in the cleaning process. Proper timing ensures efficient cleaning and safety.
Care and Maintenance of the Kenmore Self-Cleaning Oven
Proper care and maintenance ensure your Kenmore self-cleaning oven performs optimally and lasts longer. Regular cleaning, avoiding harsh chemicals, and maintaining the door seal are key to preserving its functionality and appearance. Follow these guidelines to keep your oven in excellent condition and ready for years of reliable service.
5.1 Regular Cleaning Tips
Regular cleaning is essential to maintain your Kenmore self-cleaning oven’s performance. Wipe spills immediately to prevent tough stains. For manual cleaning, use a baking soda paste or mild detergent. Avoid harsh chemicals, abrasive cleaners, or bleach, as they can damage the oven’s interior. Clean racks separately in soapy water. After self-cleaning cycles, wipe down surfaces with a damp cloth to remove residue. Regular maintenance ensures a clean, efficient, and long-lasting oven. Always refer to the manual for approved cleaning methods to avoid damage.
5.2 Wipe Up Spills Immediately
Wipe up spills immediately to prevent them from hardening and becoming difficult to clean. Use a paper towel or damp cloth to remove food debris after each use. Avoid using harsh chemicals or abrasive cleaners, as they can damage the oven’s finish. Regular wiping maintains the oven’s appearance and ensures the self-cleaning cycle works effectively. For tougher spills, mix baking soda and water to create a paste, apply it, and wipe clean after cooling. This routine prevents grime buildup and keeps your oven in great condition.
5.3 Avoiding Damage to the Oven Interior
To protect your Kenmore oven’s interior, avoid using metal scrapers or abrasive cleaners, as they can scratch the surface. Never use harsh chemicals, as they may damage the finish or harm the self-cleaning coating. Avoid extreme temperature changes, such as placing cold dishes in a hot oven, to prevent cracking. Additionally, refrain from cleaning the oven door gasket, as this can compromise the seal. By following these guidelines, you can maintain the integrity and functionality of your oven’s interior for years to come.
5.4 Maintaining the Oven Door Seal
Maintaining the oven door seal is crucial for efficient performance and safety. Avoid cleaning the gasket, as this can damage the seal. Never use harsh chemicals or abrasive cleaners, as they may degrade the material. Ensure the door is completely closed before starting the self-cleaning cycle to prevent damage from extreme heat. Inspect the seal regularly for wear or cracks and replace it if necessary. A well-maintained seal ensures proper heat retention and protects against leaks during cleaning. Follow these steps to keep your oven door seal in optimal condition for years to come.
Troubleshooting Common Issues
Identify and resolve common issues like error codes, door lock malfunctions, or self-cleaning cycle problems. Refer to the manual for solutions or contact Kenmore support for assistance.
6.1 Issues with the Self-Cleaning Cycle
If the self-cleaning cycle doesn’t start, ensure the oven is empty, racks are removed, and the door is closed tightly. Check for error codes or a locked door. If the cycle stops mid-operation, restart the oven. Avoid using harsh chemicals or abrasive cleaners, as they can damage the interior finish. For persistent issues, consult the manual or contact Kenmore support. Regular maintenance and prompt cleaning can prevent many common problems, ensuring smooth operation of the self-cleaning feature.
6.2 Oven Door Lock Malfunction
If the oven door lock malfunctions, ensure the door is fully closed and latched. Check for food residue or debris blocking the lock. Avoid forcing the door open, as this can damage the mechanism. If the issue persists, unplug the oven and inspect the lock for damage. Error codes like F23 or F45 may indicate a lock-related problem. Refer to the troubleshooting section for specific solutions or contact a professional if the issue isn’t resolved. Regular cleaning and maintenance can help prevent such malfunctions.
6.3 Error Codes and Solutions
Kenmore ovens display error codes to indicate specific issues. Common codes like F23, F45, or E01 signal problems such as faulty sensors, door lock malfunctions, or system errors. Refer to your manual to decode the error. Restarting the oven often resolves temporary glitches. For persistent issues, check sensor connections or clean components as instructed. If unresolved, contact Kenmore support for professional assistance. Always follow the manual’s troubleshooting guide to avoid further complications and ensure safe repairs.
6.4 When to Call a Professional
If you encounter issues beyond basic troubleshooting, such as persistent error codes, electrical problems, or safety concerns like a malfunctioning door lock during the self-cleaning cycle, it’s crucial to call a professional. Experts can diagnose and repair complex problems, ensuring your oven operates safely and efficiently. Additionally, if you’re unsure about performing repairs or if the issue is under warranty, contacting Kenmore support or a certified technician is recommended to avoid further damage or hazards.

Manual Cleaning of the Kenmore Self-Cleaning Oven
For manual cleaning, use a baking soda paste or gentle cleaners. Avoid harsh chemicals and abrasive scrubbers to prevent damage. Clean racks separately and dry thoroughly after washing.
7.1 Using Baking Soda for Manual Cleaning
For manual cleaning, mix baking soda with water to form a paste. Apply it to the interior surfaces, avoiding the door gasket and racks. Let it sit overnight, then wipe clean with a damp cloth. This method is gentle yet effective, removing grime without harsh chemicals. Ensure the oven is cool before starting. Avoid abrasive scrubbers to prevent damage. Rinse racks separately and dry thoroughly. This eco-friendly approach keeps your oven clean and maintains its performance. Ideal for light to moderate soil buildup, baking soda is a safe and reliable cleaning solution.
7.2 Cleaning the Oven Racks
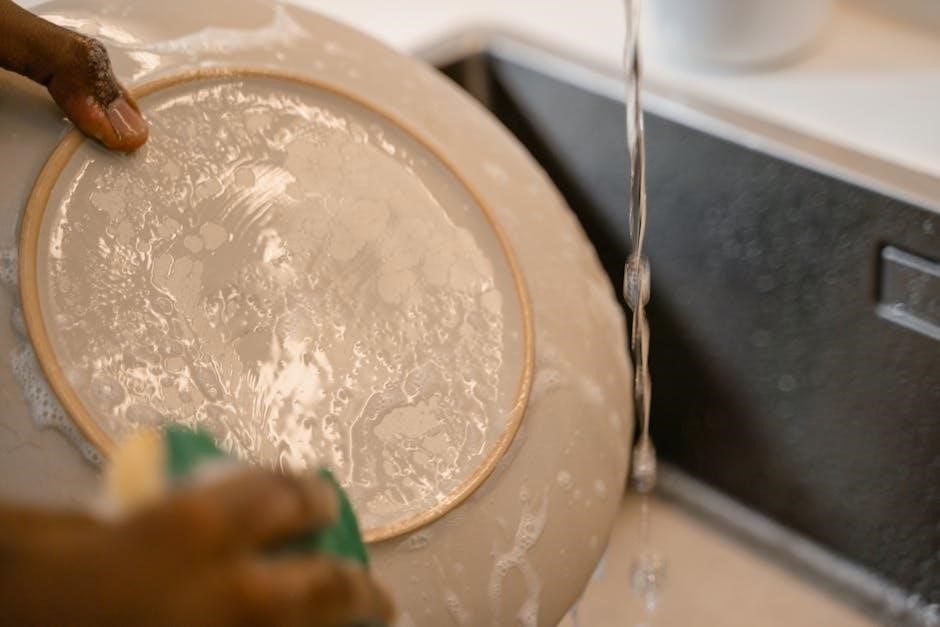
Cleaning oven racks is essential for maintaining hygiene and performance. Remove racks and soak them in a mixture of baking soda and water for several hours. Scrub gently with a non-abrasive sponge or brush to avoid scratching. Rinse thoroughly and dry before returning to the oven. For tougher grime, let the racks soak overnight. Avoid using harsh chemicals or abrasive cleaners, as they may damage the finish. Regular cleaning prevents food residue buildup and ensures even cooking. Always clean racks by hand, as dishwashers may damage them.
7.3 Avoiding Harsh Chemicals
Harsh chemicals can damage the oven’s interior and door gasket, so they should be avoided. Instead, use natural alternatives like baking soda mixed with water to create a gentle cleaning paste. Apply the paste, let it sit, and wipe clean with a damp cloth. This method is safe and effective for maintaining your oven’s finish. Always refer to the manual for approved cleaning products and methods to ensure longevity and safety. Avoid abrasive cleaners or scourers, as they may scratch surfaces. Stick to gentle, manual cleaning techniques for best results.
7.4 Drying the Oven After Cleaning
After manually cleaning your Kenmore self-cleaning oven, it’s important to dry it thoroughly to prevent water spots and maintain its finish. Use a soft, clean cloth to wipe down all surfaces, paying extra attention to areas around the door and racks. To speed up the drying process, set the oven to a low temperature (150°F ─ 200°F) for about 15-20 minutes. This will help evaporate any remaining moisture. Ensure the oven door is left ajar to allow airflow, promoting even drying. Avoid using harsh chemicals, as they can damage the interior. Once dry, inspect the oven to ensure no streaks or residue remain.
Advanced Features of the Kenmore Self-Cleaning Oven
The Kenmore Self-Cleaning Oven features advanced options like convection cooking for even heating, a delay start for convenient scheduling, and energy-saving modes to optimize performance and efficiency.
8.1 Convection Cooking Options
The Kenmore Self-Cleaning Oven offers convection cooking, which uses circulating hot air for even heating and faster cooking times. This feature is ideal for roasting, baking, and broiling, ensuring consistent results. The convection fan distributes heat uniformly, reducing cooking time by up to 30%. It also enhances browning and crisping, making it perfect for dishes like roasted vegetables or crispy meats. For optimal performance, refer to the manual for specific convection temperature and time adjustments. This advanced feature elevates your cooking experience, providing professional-grade results in the comfort of your home.
8.2 Delay Start Feature
The Kenmore Self-Cleaning Oven features a convenient Delay Start option, allowing you to schedule cleaning or cooking to begin at a later time. Simply set the desired start time using the oven controls, and the cycle will automatically begin. This feature is perfect for busy schedules, enabling you to plan meals or cleaning sessions in advance; Ensure the oven is empty and vents are clear before setting the delay. The oven will lock and start the cycle at the programmed time, providing hands-free operation. This function enhances flexibility and efficiency in your kitchen routine.
8.3 Locking the Oven Door
The Kenmore Self-Cleaning Oven features an automatic door-lock mechanism for safety during high-temperature cleaning cycles. The door locks securely when the self-cleaning cycle begins and remains locked until the oven cools down. This prevents accidental burns and ensures cleaning efficiency. For manual locking, press and hold the door lock button until it clicks. Never force the door open during a cycle, as this can damage the lock or door. Always wait for the oven to cool and the door to unlock automatically before accessing the interior. This feature enhances safety and ensures proper cleaning performance.
8.4 Energy Efficiency Features
The Kenmore Self-Cleaning Oven is equipped with energy-efficient features designed to minimize power consumption while maintaining optimal performance. The advanced insulation ensures heat retention, reducing energy loss during cooking and self-cleaning cycles. Additionally, the oven’s sensor technology optimizes temperature control, preventing unnecessary energy use. These features not only lower your utility bills but also contribute to a more environmentally friendly cooking experience. By efficiently managing energy, Kenmore ensures your oven operates effectively without compromising on performance or safety.

User Tips for Optimal Performance
Regularly clean spills, use the correct tools, and avoid overcrowding to maintain efficiency. Prompt cleanup prevents tough stains, ensuring your Kenmore oven performs optimally and lasts longer.
9.1 Keeping the Oven Clean Regularly
Consistent cleaning is essential for maintaining your Kenmore oven’s efficiency and appearance. Wipe up spills immediately to prevent stubborn stains from forming. After each use, remove food debris and crumbs. For tougher stains, utilize the self-cleaning feature or manual methods like baking soda paste. Regular maintenance ensures optimal performance and extends the lifespan of your appliance. By incorporating these habits, you’ll keep your oven in pristine condition and ready for your next culinary creation.
9.2 Using the Right Cleaning Tools
For effective and safe cleaning of your Kenmore oven, use the right tools and materials. A mixture of baking soda and water creates a gentle yet effective cleaning paste for manual cleaning. Avoid harsh chemicals or abrasive scrubbers, as they can damage the oven’s interior or finish. Instead, opt for soft cloths or sponges to wipe down surfaces. Kenmore recommends using approved cleaning products to maintain your oven’s condition and ensure longevity. Always refer to the manual for specific cleaning tool recommendations tailored to your appliance.
9.3 Avoiding Overloading the Oven
Avoid overloading your Kenmore self-cleaning oven to ensure even cooking and prevent damage. Overcrowding can block air vents, leading to uneven heat distribution and potential safety hazards. Always leave adequate space between dishes to allow proper airflow. Never stack cookware or utensils excessively, as this can obstruct the oven’s performance. Additionally, avoid using cookware that is too large or improperly fitted, as it may interfere with the oven’s functionality. Proper spacing ensures efficient cooking and maintains the oven’s longevity, adhering to the guidelines outlined in your Kenmore manual.
9.4 Checking for Software Updates
Regularly checking for software updates is crucial for maintaining your Kenmore self-cleaning oven’s performance. Updates often improve functionality, add features, and fix issues. To check for updates, refer to your oven’s digital display for prompts or follow the manual’s instructions. Typically, updates are installed via a USB port or Wi-Fi connection. Ensure your oven is connected to the internet or insert the provided USB drive. Always follow the manufacturer’s guidelines to avoid disruptions. Keeping your oven updated ensures optimal performance and access to the latest features. Consult your user manual for specific update procedures and requirements.
Warranty and Support Information
Your Kenmore self-cleaning oven is backed by a comprehensive warranty. For details, visit Kenmore’s official website or contact their customer support team. Register your oven to ensure warranty validity and access exclusive support services. Refer to the manual for specific terms and conditions.
10.1 Understanding the Warranty Terms
Understand your Kenmore oven’s warranty for coverage details and duration. The warranty typically covers manufacturing defects and parts replacement for a specified period. Register your oven to activate the warranty, ensuring all terms are upheld. Review the manual for exclusions and conditions. Contact Kenmore support for any warranty-related inquiries or claims. Proper maintenance and adherence to manual guidelines are essential to maintain warranty validity. Stay informed to maximize your warranty benefits and protect your investment.
10.2 Contacting Kenmore Customer Support
For assistance with your Kenmore self-cleaning oven, contact customer support through phone, live chat, or email. Visit the official Kenmore website for contact details and support options. The support team is available to address warranty inquiries, troubleshooting, and general product advice. Ensure you have your oven’s model number ready for faster assistance. Kenmore’s customer service aims to provide timely and effective solutions to enhance your user experience. Reach out for any questions or concerns regarding your appliance.
10.3 Finding Authorized Service Providers
To locate authorized service providers for your Kenmore self-cleaning oven, visit the official Kenmore website. Use the “Service Provider Locator” tool, entering your zip code or city to find nearby authorized technicians. Ensure your oven is serviced by professionals trained to handle Kenmore products. Authorized providers use genuine parts and adhere to manufacturer standards, ensuring reliable repairs and maintaining your oven’s warranty. Contact Kenmore customer support for assistance in finding a trusted service provider near you.
10.4 Registering Your Kenmore Oven
Registering your Kenmore oven is a simple process that ensures warranty validation and personalized customer support. Visit the official Kenmore website and navigate to the product registration section. Fill out the required form with your oven’s model number, purchase details, and contact information. This step helps Kenmore maintain accurate records and provides you with exclusive updates, promotions, and service notifications. Ensure your oven is registered within 30 days of purchase to enjoy uninterrupted warranty benefits and enhanced customer service.